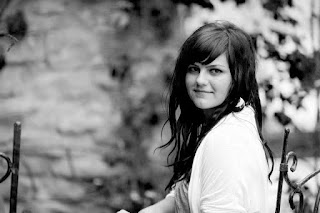
I guess the title says it all.While extracting people the hardest part of it always is the extraction of hair because most of the time you can't draw by hand a selection that will yield convincing enough results.Here is the image I will be using.You have to admit(because you don't want to disagree with me if you know what is good for you!) that she is a very, very sexy girl!
Probably the first question that pops up in your mind is "What is her phone number?!". Well that is what I am trying to figure out as well.Since in this country all mobile numbers start with 07 it only leaves me with roughly 100 million possibilities and a huge phone bill if I try all the possibilities out.
Alright! I will finally get to the point.The answer is CONTRAST! You need some contrast to start with in order to make an extraction possible.That is why they use green or blue screens in film making as well.The image above was not shot with a green screen in the background but because she has dark hair,there still is enough contrast to perform a good extraction.Blond hair would mean we are in deep crap since the color of the hair would be very close to the color of the wall in the background.Probably I will get back to this in the future with an example like that.So lets get down to business.I will be working in RGB color mode.Since images that come from digital cameras or from the web are all in RGB mode no adjustments are needed after opening the image but in case you don't know from where you can change color spaces,it is in the upper most menu bar, Image/Mode.Here are the three color channels that contain the color information of the image in RGB mode.
This is the red channel:
green:
blue:
You can find these under the channels tab next to the Layers panel, or you can go to Window/Channels in case you can't find it.The lightest parts in these channels represent the pixels that contain most of that specific color.So the skin is very bright in the red channel because skin tones contain a lot of red.What I'm trying to find out by looking at these is what channel has the most contrast between the hair and the background.I guess I will work with the red channel but green could be an option as well.First of all I will unlock the Background layer because I will apply a mask to it after my selection will be ready.You can't apply a mask to a locked layer.To do that I will double click the background layer and hit ok in the dialog box that pops up.Now it will be called Layer 0 and the lock will disappear.
I will go to Image/Calculations.A dialog box will pop up.I will choose Red from the drop down menus and a blend mode of multiply.With other images some experimentation will always be required in order to further enhance the contrast between the hair and the background.
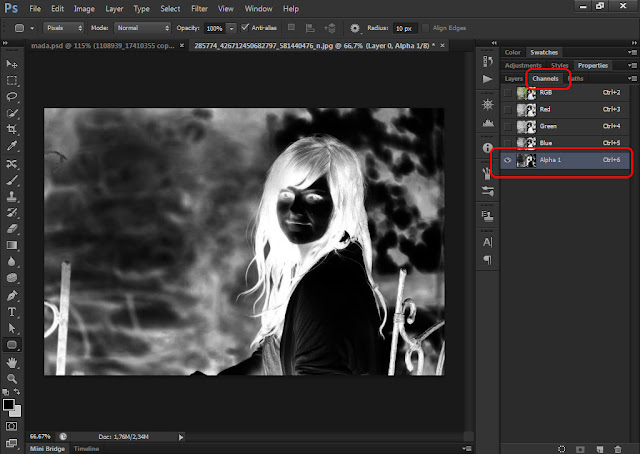
Yet it may not look like there would be much contrast between the hair and the background,but watch what happens if I check both invert check boxes.Sometimes it works better with only one of them checked or you might not need them at all.By making the hair white it gets me closer to what I want to achieve because in order to create a selection I will need to have the hair white.But you can always invert the new channel itself that will get created,that is why you need to set the result to New channel.Anyway by inverting it also helped me create more contrast.Once you hit ok a new alpha channel will be created,you can see it in the channels panel.
Next I could use Curves or Levels in order to try and make the background pure black.I guess I will use Levels.It really does not matter since I will use the eyedroppers that are present in both the Levels and Curves dialog.I will click with the black eyedropper on a lighter part of the background to make that tone the black point of the image.This will push most pixels from the background into the black area.
Now the alpha channel looks like this
Next I will simply take the brush tool and paint the rest of the background black and the hair white.While working on a channel you can only use black,white or shades of gray.Hit "D" to set back your foreground and background colors to black and white.Hit "B"for the brush tool,or select it from the tools panel.You will always be painting with the foreground color which should be black after hitting "D".In order to swap the foreground with the background color you can hit "x" and you will be painting with white.
However there is some fine detail that should be turned into white but it is to complicated to get it accurately with the brush tool.I will hit Ctrl+L again and this time use the white eyedropper to turn that detail into white.
In order to transform this into a selection you have to Ctrl+click the thumbnail of the alpha channel.This will load the lighter pixels as a selection.Now you have to click on the top most channel the one labeled RGB in order to go back to the color version of the image.This will deactivate the alpha channel but keep the selection.
Click back on the Layers tab next to the channels tab or go to window/layers.Click on the mask button at the bottom of the layers panel and this will create a mask for the image from the selection.This means everything that falls out of the selection will be invisible(but not deleted).Once the mask is applied you should introduce transparency in the image.
After creating the mask it should be active by default but you could also click on it to make sure it is selected.Now with the brush tool I painted back in the rest of the body and adjusted a few edges at the hair.Painting with white will make detail visible again,painting with black will hide.Use "X " to swap your foreground and background color when needed.
We lost some of the tiny detail at the edges but I can live with that.I have my own technique for bringing back some of that very fine detail as well.But it is late and I will stop here.There will be a part two to this explaining those steps as well.The girl is ready know to be used on other backgrounds by moving this layer 0 into a new document that contains the new background or I could Import a new image into this document as well.You should click and drag the new image under layer 0 in the Layers panel else it will sit above and cover the person you extracted.(just in case you did not know that!)You will also have to scale or rotate if needed.
And here is a more finished version that turned out not looking to great,but anyway!


No comments:
Post a Comment